Dynamic tags
Dynamic tags can be used in email and settings fields to send dynamic data to the customer.
Most of the form’s settings fields support Dynamic Tags.
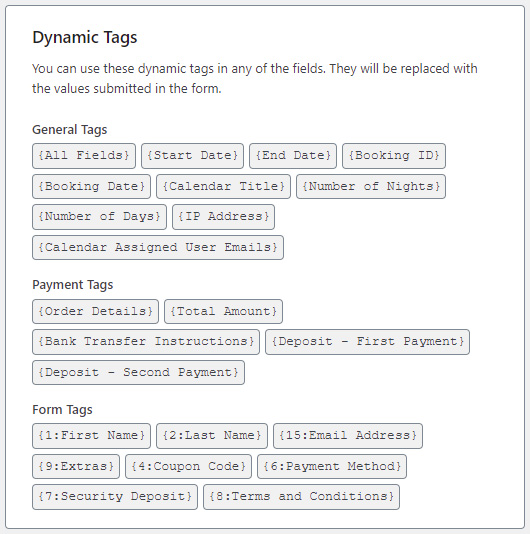
There are some standard tags, and one tag created for each form field.
{All Fields} |
A table containing all the form fields and booking details. |
{Start Date} |
The booking start date (check-in date). |
{End Date} |
The booking end date (check-out date). |
{Booking ID} |
The booking’s unique ID number. |
{Booking Date} |
The date when the booking was made. |
{Calendar Title} |
The title of the calendar the booking was made in. |
{Calendar Title} |
The title of the calendar the booking was made in. |
{Number of Nights} |
The booking length measured in the number of nights. Works well when the Selection Style is set to Split Days. |
{Number of Days} |
The booking length measured in the number of days. Works well when the Selection Style is set to Full Days. |
{IP Address} |
The customer’s IP address. |
{Signature} |
The customer’s signature, if the Signature field was added to the form. This tag can only be used on the Contract body text. |
{Calendar Assigned User Emails} |
A comma-separated list containing the email addresses of any users assigned to a calendar. Useful if you wish to send emails to users assigned to a calendar. |
{Order Details} |
A table containing all the prices and totals. |
{Total Amount} |
The total amount that needs to be paid or was paid. |
{Outstanding Amount} |
The amount that still needs to be paid. Works with Part Payments only. |
{Deposit - First Payment} |
The amount of the first payment. Works with Part Payments only. |
{Deposit - Second Payment} |
The amount of the second payment. Works with Part Payments only. |
{Final Payment Link} |
The link to the Final Payment page. Works with Part Payments only. |
{Bank Transfer Instructions} |
Bank Transfer Instructions. These can be set in the Payment → Bank Transfer page. Works with Bank Transfers only. |
{1:Field Name} |
Form field dynamic tags. A dynamic tag is generated for each existing form field in your form. Using these will replace them with the value entered by the customer in the form. |
When an email is sent or a setting field is processed, these tags will be replaced with the values submitted in the form.
For example, if you have a field called Name which has the ID 2, the tag will be {2:Name}. You can add this in the Subject field of the email, like so: “Hello {2:Name}”. If a visitor makes a booking and enters his name, let’s say John, when he receives the email, the subject will be “Hello John”.
